Showing posts with label vegetarian. Show all posts

Sunday, December 4, 2011

Kρητικός ντάκος, or how to eat Cretan barley rusks

Now that summer is officially here, there's the chance you'll find some tomatoes that actually taste the way tomatoes should. I'd be lying if I told you I've ever tasted a tomato here in Australia that comes close to the ones we eat in Greece; there's something about the Mediterranean sun that works magic on the fruit, because they're always sweeter and more fragrant than tomatoes here - and very often they're meatier with less water. But if you're growing your own or happen upon some at the farmer's market that have that intoxicating smell (you do sniff tomatoes before you buy them, right?), this is a beautiful way of eating them.


Dakos is a particular type of paximádi (dried bread or rusk) and is a speciality of the island of Crete. While paximádi are eaten all over Greece, dakos are particular in that they're made with stone-ground barley, imparting a rich nutty flavour and giving the rusks an addictive robust texture. The rusks are twice-baked until very, very dry and need to be rehydrated with sprinkles of water and then brought to life by the sweet spicyness of tomato juices and fresh olive oil soaking through. You might be surprised by how good this simple combination is, unadorned - but if you want to take these to the next level (of course you do), crumble on a creamy feta or chevre and a sprinkle of Greek oregano. So simple, but really a magical combination that becomes more than the sum of its parts. If you're in the mood for garlic and don't have a date that night, add a little - very finely minced - to make it a little more punchy.

You can buy Cretan rusks at most good Greek delis; they usually come packaged in plastic or cellophane bags. My favourite are Manna brand ("Το Μάννα") and have a green and white printed label, but ask the staff as there's often quite a number to choose from and more seem to be imported all the time. Wetting the rusks might seem a strange thing to do, but what you end up with is never soggy - only pleasantly toothsome and porous enough to soak up all the flavours you pile on top. Don't try to eat them dry, as you'll seriously risk losing teeth. Kinda like the time Richie and Eddie ate the Special K past its sell-by. Watch and learn, kiddies.

Dakos - and rusks generally - are very good for tossing into salads and are perfect for brown bag lunches. I often cut a salad in the morning then rehydrate the rusks 15 minutes before lunch. When they're soft enough, I break them up and stir them through the rest of the salad before adding my dressing. If summer lunches have to be eaten at work, this is a fine way to improve the day. At home though, I prepare them as below.

Kρητικός ντάκος/Cretan barley rusks with tomato
Makes 1

1 paximádi/rusk
1 ripe tomato, skinned, very finely chopped or grated
your best extra virgin olive oil
salt
a couple of slivers of garlic, finely minced (optional)
a sprig of fresh Greek oregano or a couple of fresh basil leaves (finely sliced)
dried Greek oregano
crumbled creamy feta or goat cheese, to taste


1. To rehydrate the rusk, run it under a running faucet, rubbing it all over so that it seems quite wet. You can also submerge rusks in a bowl of water for half a minute or so. Set aside to drain and soak through.

2. In a smal bowl, combine tomato, fresh oregano or basil leaves, garlic (if using), salt to taste and a generous glug of olive oil. Stir and set aside for 10 minutes so that the flavours combine.

3. Some people like their rusks more wet, other more crunchy - you decide. I feel mine's ready when it has a little give but doesn't leak water when I press into it. Top the rusk with the tomato mixture, add the cheese and rub the dried oregano between your fingers as you sprinkle it on top, to release its flavour.

Friday, August 12, 2011

olives with orange, rosemary, oregano and garlic

Making dinner for a friend last night, I wondered if I should blog any of the dishes I was preparing. In the moment I had that thought, I was peeling a long strip of orange peel to toss into my bowl of olives. Because preparing these is part of my weekly routine and is sort of this automatic thing I do after coming home from the market, I didn't realise that what I should write about are these olives, precisely. This is my favorite way to prepare olives.


I don't mean to cure olives from scratch; that's one thing that I just haven't had time to try, though I think about it often. This is just a simple preparation that will lift a tub of good, plain olives to a new level. I've never been one to buy pre-marinated olives; so often they seem overloaded with poor-quality dried herbs and flakes of stuff that cling annoyingly to the olives in a thick slick of poor-quality oil. I preferred a good olive plain, meaty and fruity - those ones that strike you during a meal like some ingenious use of punctuation when you're reading. Until I made these, that is.

What I love about these is that the clean, robust mouthfeel of the plump olive is preserved, but when you bite in, there's this wonderful aromatic explosion that happens. And it is led predominantly, surprisingly, by the flavour of the orange. Rosemary is a natural pairing for the citrus fruit, but oregano is very good too and here I've used both. Sometimes I add garlic, sometimes I don't. In short, you can add what you like here, as long as you try throwing in that long strip of orange peel - and then tell me what you think.

Lastly, some things I think are important in olives. People often comment how nice the olives I buy are - it's not a fluke! I'm fussy. It's worth sourcing good-quality olives - it doesn't necessarily mean they'll be more expensive or hard to find. Just ask to try one before you buy. I buy large Kalamata olives, out of habit and because I love them. My family is from Kalamata; this may have something to do with it. But as a rule of thumb, they shouldn't be mushy or really, really salty; instead you want meaty and robustly flavoured fruit. If you can't find large olives firm enough for your taste, try going the next size down: with less meat they often hold up better to storage and transportation. And finally, pitted or unpitted? Whole olives with their stone will win my heart every time, even if a pitted olive can sing like Jarvis Cocker. When the stone is taken out, brine washes right through the flesh of the olive, often leaving them really salty and destroying the fruit's texture. Besides, there's nothing more sexy than eating olives with your hands on a dinner date; as Jarvis says, "if you didn't come here to party, then why did you come here?"

Olives with orange, rosemary, oregano and garlic

1 small tub of large Kalamata olives (or whatever you prefer)
2 strips of orange peel
2 small sprigs rosemary
2 small sprigs oregano (or other fresh herb)
2 cloves of garlic, unpeeled, but poked in a few places with the tip of your knife
3 tbsp good-quality olive oil

1. Mix all ingredients together gently and pop into the fridge. Leave overnight, tossing them about a little whenever you think of it (2 or 3 times). Voila.


Thursday, March 31, 2011

What is فريكة‎ ? Why, it's freekeh. What is freekeh?

Today I'm stuck on the couch with a cold, but instead of watching Dr Phil and Oprah, I thought I'd use the time to geek out over my latest grain obsession, freekeh. Maybe everyone out there already knows about this magical, nutty stuff? But after I was introduced to it at Hellenic Republic in the salad you'll find below, I went looking for it - and many didn't even know who my little friend was, let alone where to find him! So just in case you haven't met, let me introduce you to freekeh.


In case you couldn't tell from the title of this post, freekeh is a grain used mostly in Arabic cooking and it's actually green wheat that has been sun dried, roasted and then rubbed, or thrashed - a process that (somehow?) gives the grain a uniform appearance and a very special flavour that is both nutty and smokey. It's so tasty that you can eat it on its own (with a little olive oil and maybe some yogurt?), but it's used in stuffings, pilafs, salads and a host of other preparations. Some types are cracked into smaller bits, others are left whole - the one I use at home is a whole grain type.

Not only does is it delicious, but is a nutritional powerhouse. Because it is harvested young, it retains more fiber, protein and vitamins. It's low in fat and low GI and even if it wasn't, I'd eat it anyway. It's the bomb. To prepare it, you need only to boil it until tender. The whole grain variety I use takes about 30 minutes to reach tender but with some bite (how I like it), but if you have the cracked grain, cooking time will be considerably less. Once it's ready, you should try it in this salad:


This is George Calombaris' Cypriot Grain Salad, and I first ate it at Hellenic Republic a few months ago with the rest of the Kannas clan. I'd visited HR before and the food had always been good, but the stars must have been aligned that night because we ate a truly glorious meal of slow-cooked lamb, cabbage salad, chargrilled octopus, saganaki with figs and this unforgettable salad. As soon as I got home I googled it and thanked the lord for the TV chef phenomenon, because I instantly had the recipe. Not that you really need one; it's really just a great idea that you can play with in all different ways. The freekeh, along with some just-tender puy lentils, form the bulk of the salad. This is seasoned with briny baby capers, sweet currants, chopped red onion and plenty of chopped parsley and coriander. Then you add crunch: toast a bunch of slivered almonds, pumpkin seeds and pine nuts until golden and throw them in. Bring the whole lot together with great olive oil and the juice of a lemon and top with a cumin-spiked yogurt that hides just a smidgen of Greek honey. In each bite, there's a bunch of different things happening, but all the flavours are at the same party and, baby, it's a good one.

When we ate it at Hellenic Republic it was topped with fresh pomegranate seeds and they were perfect: little jewels bursting with sweet sour juice that explode into the rest of the flavours when you bite in. Sadly, I couldn't find any this week, so I topped the yogurt here with a dollop of pomegranate molasses, to remind me of that first taste. I served alongside some quickly fried slices of spicy Greek loukanika (leek and pork sausage). It was good. I hope you think so too.

Cypriot Grain Salad
Adapted from George Camlombaris' recipe, published on ten.com.au

Notes: Freekeh is available at Middle Eastern grocery stores and some health food shops. The one I buy is produced in Lebanon and sold at Hassoun's Coffee, 384 Gilbert Road, Preston. An aside: this store is so ace I can't believe I'm publishing the address on the internets. Click here for more information about Australian freekeh. Serves 6 as a side dish. This salad keeps really well for a couple of days, so makes a great brown bag lunch dish.


1 cup freekah (or cracked wheat)
½ cup puy lentils
1 bunch coriander shredded
½ bunch parsley shredded
½ red onion finely diced
2 tbsp baby capers
½ cup currants
2 tbsp pumpkin seeds
2 tbsp slivered almonds
2 tbsp pine nuts
Juice of 1 lemon
3 tbsp extra virgin olive
Sea salt to taste
½ cup thick Greek yoghurt
½ tsp cumin seeds toasted and ground
½ tbsp honey
fresh pomegranate seeds, or molasses to taste

1. Cook freekeh and lentils separately until just tender. Drain and set aside to cool.

2. Meanwhile, add coriander, parsley, onion, capers and currants to a large bowl.

3. Toast pumpkin seeds, almonds and pine nuts until golden, being careful not to burn. Add to bowl.

4. Add drained and cooled lentils and freekeh and stir gently to combine. Add sea salt, lemon juice and olive oil and continue to stir gently until the salad looks nicely dressed.

5. For yogurt topping, stir cumin and honey into yogurt. Top salad with yogurt and pomegranate seeds or molasses, if using.

Saturday, January 29, 2011

kρητική σαλάτα με γλιστρίδα / cretan salad with purslane

Around this time of the year in Melbourne (and elsewhere, I'm sure), if you have any garden space at all (propagated, slighted forgotten, pit of dirt etc), chances are that this is popping up through the soil to say hello:


The vine-leafy thing belongs to one of my watermelon vines, but that other succulent-looking and rather cute little weed is actually purslane - and it is very good to eat. There are a good number of common "weeds" that Greeks collect and cook and eat, but purslane is one of the most commonly found - yet it's one of the most nutritious vegetables you could put on your plate, or into your salad, as the case may be.


This little plant, that so many people pull out of their gardens and throw into the green waste bin, actually has higher levels of omega-3 fatty acids than any other vegetable plant! And them's those good fatty acids, like in fish - so it's a great source for vegetarians. It also has really high levels of antioxidants and other vitamins and minerals. It's like a wonder food - and it could be growing in your yard right now! Go out and have a look. And if you're into a bit of biological research (I really am), click here to have a look a report from a detailed study of the nutritional properties of purslane and other wild weeds that Greeks eat.


I've got a couple of purslane recipes up my sleeve, but I thought I'd introduce the little wonder herb with a gorgeous Cretan salad, because the weather is warm and the tomatoes are ripe. Cretan salad is like a regular Greek salad with a twist or two: in this case I've added fresh sprigs of purslane and cretan dakos, or rusks. These are wonderful little country-style dried bread slices (I've used miniature here, but you could get the larger ones and break them up) that you moisten with a little water and throw into the salad to soak up all the lovely dressing and juices from the tomatoes. They're often made with barley, making them very good for you, but you can get a few different sorts. Rusks are eaten all over Greece, but a good rule of thumb when buying them here is to look for word 'Cretan' or 'Κρητικά'; they're definitely the best ones imported. Try Greek delis and supermarkets in suburbs like Brunswick, Preston, Northcote or Oakleigh if you're having trouble finding them. They're well worth a bit of a trek.

I've hardly ever seen a Greek salad being dressed with pre-mixed dressing. The salt, vinegar and oil are added separately at the end, to suit individual tastes. This might take a bit of practice, but you'll soon be dressing salads perfectly with a few flicks of the wrist. Remember, you can always add more oil, salt etc after a taste! The ideal Greek salad encompasses a range of textures and flavours; it should be sweet and sharp, creamy and crunchy, salty and juicy. And all the deliciousness should concentrate in a pool at the bottom of your bowl, ready to be soaked up with fresh bread, or pieces of rusk. Accompany with an ouzo on ice on a hot day. After eating, recline and think about how healthy your lunch was - and consider pouring another glass.

kρητική σαλάτα με γλιστρίδα / cretan salad with purslane

Serves 1 as a yummy big lunch, or two as a side

4 small cretan rusks, or 1 or 2 larger rusks
1 large red ripe tomato, cored and sliced into wedges
1/2 medium or 1 small lebanese cucumber, peeled in parts, seeded and sliced
1/2 a small onion, very thinly sliced
a smallish piece of feta (as much as you like to eat in a salad)
5 or 6 stalks of purslane, rinsed and picked over (you don't want the thickest part of the stem)
a couple of sprigs of Greek basil (or regular basil), leaves picked
a big spoonful (or to taste) of Kalamata olives
a couple of cherry tomatoes, halved
some nice salt (Maldon, sea salt etc)
white wine vinegar (nothing too strong - sherry vinegar is nice!)
good olive oil
rigani, or dried Greek oregano

1. Run your cold tap and pass the rusks under until wet all over. Leave for a few minutes to drain and moisten through.

2. Combine tomato, cucumber, onion, feta, purslane, greek or regular basil leaves and the moistened rusks and toss to combine.

3. Add your olives and halved cherry tomatoes to make it look a little more pretty. Sprinkle with a good pinch of salt, or to taste. Add a few drops of vinegar (holding your thumb over the end of the bottle if it doesn't have a pouring thingy) over the salad. Top this with a few glugs of olive oil. The salt should have travelled through the salad on the little streams of oil and vinegar and the dressing. Genius, huh? Sprinkle with dried oregano and tuck in.

Saturday, January 15, 2011

food lover's cleanse: week two round-up

Life just happens, I guess. The past week has been both chaotic and sad; I became really unwell (not food related, bien sûr) and was stuck at home in bed feeling hopeless as I watched chaos unfold outside on my little television screen. Thousands upon thousands of homes in Queensland disappeared under water, bushfires tore through parts of Western Australia. As humidity here in Melbourne hit record highs, the carpet began to feel sticky to walk on and food in the kitchen began to rot. So I couldn't make borscht, or baked chutney-stuffed fish. Instead I ate muesli with rice milk, leftover lentil soup and crackers. I drank lots of water and a couple of gin and tonics. I really feel like an adult now that I can honestly know and understand that there's no point beating yourself up when plans go awry - for it's taken many years of feeling guilty and disappointed in myself to get to this point. So cheers to that.


So in lieu of my two-day summaries, I thought I'd post today about some of the highlights from the cleanse recipes I did manage to put together. Despite the strangeness of the week, I discovered another handful of recipes that I'd gladly make again. Take that roasted salmon with avocado and pink grapefruit salad pictured above, for instance. This is not the kind of thing I'd usually make for myself at home; single-portion pieces of salmon always seem sort of sad to me, like if I ate one on a Friday evening watching television, I'd be joining hundreds of health-conscious late-20s, early to mid 30s single girls all around the country in this moment of culinary simultaneity that ends with a pregnant and melancholic sigh. Yes, you've done something good for yourself, but YOU. ARE. ALONE. Or maybe that only happens when you serve it on steamed bok choy? Because this was nothing like that; it was bright and punchy and juicy and zingy. It was the kind of thing you might eat before you go out for a night on the town, or while you're crazily typing away, wrapped in the excitement of a new project. The fillets of juicy grapefruit punched through the richness of the roasted fish, while the avocado provided little slivers of luxurious creaminess to balance it all out. I used the citrus shallot vinaigrette to tie the whole lot together and it was excellent. I'm now wishing I had a grapefruit - and a single-portion of salmon - for dinner this evening.


This sweet potato hash with poached egg was gooooood. Another one I didn't expect to enjoy so much, though for less existential reasons: look, sweet potato is just not my favourite thing in the world. I quite like it melted into a curry or smooshed up into a pie filling, but I can't get the knack for roasting or frizzling them into something delicious and I was sure that these home fries were going to be a little bland, annoyingly sweet and lacking... something. But actually, once you carefully place a poached egg on the top of these babies the dish is complete - and completely delicious. I used a golden sweet potato (to trick myself into liking it more) and boiled the cut and peeled chunks until just tender. They were then thrown into the pan with olive oil and red onion, a little brown sugar and some pumpkin pie spice mix. Dear lord! What is this magical stuff? I looked up a recipe online and made my own - and now I can't wait to try it out in other recipes. Anyway, the potatoes went all golden and crispy but a bit sticky and formed the perfect starchy base for the runny egg. It was ace.


Third, here's the soup I mentioned the other day: Molly's (of Orangette) Curried Lentil Soup. I didn't make it for the specified day, but had made a big pot only a couple of weeks ago and so understood the power of its awesomeness already. When things started to go haywire health-wise, I (in a rare moment of clarity and foresight) made another big pot and froze the soup in batches. I've been eating it whenever the weather has allowed since. It's a spicy and creamy-thick soup, but doesn't contain dairy, unless you add the little bit of butter at the end. Instead, it's richness comes from the addition of a can of pureed chickpeas that are stirred through the lentils towards the end, fortifying the soup and lending a comforting density and creaminess to the texture. I LOVE this soup. I hope you'll try it. When I took the picture above, I was eating while reading the latest edition of Gourmet Traveller, planning what to cook in the brighter days ahead.

There are a couple more recipes I wanted to tell you about, but perhaps tomorrow. Right now the sky is blue, pretending that the last week never happened. It's a strange trick that almost works.

Monday, January 3, 2011

food-lover's cleanse days 1 & 2

So I'm doing this thing for my HEALTH, right? But I'm eating the most yum food ever. Really. It must sound like I'm being endorsed by Bon Appetit or something (ha! I wish). I'm two days in and already I've found three great recipes that I'm definitely going to make time and time again.


Day 1 had me chowing down on a yummy mushroom, thyme and caramelised onion omelet with toast, an avocado tartine, a vanilla-date smoothie that tasted like heaven, and the dish you see above - the ultimate winter couscous. This vegetable dish is incredible. It is full of perfectly cooked vegetables and layers of flavour that reveal themselves one after the other: sweet butternut pumpkin, the tang of dried apricot, warm cinnamon and cardamon, the heat of harissa and an exotic piquancy courtesy of some finely minced preserved lemon that is thrown in at the end. I switched the star anise (was all out) for a couple of cardamon pods and replaced unavailable parsnip with an extra carrot. Next time I make it, I'll do as the recipe says, but I can't imagine it tasting much better than it did last night. Also included in Day 1 were winter vegetable crudités and an orange salad for dessert, but surprisingly, I couldn't fit either of those in.


Day 2 began with a breakfast I'd been looking forward to: the warm and nutty cinnamon quinoa from 101 cookbooks. I didn't have blueberries or red quinoa, so used raspberries and black quinoa. I forgot to put nuts on top, but I had bought hazelnuts for this purpose. No matter though, as it was a double-batch and I get to eat the leftovers again tomorrow morning - with hazelnuts! Not only is it completely delicious, but it seemed to have like, this super-energising effect and I swam 2 kilometers in the pool today and didn't even feel tired. Another recipe to add to the regular rotation. I skipped the fancy salad at lunch today (celery root and apple salad) in favour of a basic green salad with citrus-shallot vinaigrette, in anticipation of a big dinner. I'm glad I left room to appreciate the glory that was Anjum Anand's black-eyed pea curry. It's what you can see in the little bowl below, beside the (yummy but rich) salmon in Bengali mustard sauce, and I know it doesn't look much there, but please trust and MAKE THIS DISH. Despite my passion for making things from scratch and the fact that I really like Indian food, I've not tried making my own curries much at all. This has got to change! The black-eyed bean dish that sits on my kitchen bench is glorious proof that sauteing whole spices, fresh garlic, ginger and tomato until it melts into a rich, fragrant paste is the BOMB.


So far after only two days I feel a bit lighter than I did after a few weeks of indulgence and loads of (albeit excellent) bread. Do you know how much bread Greeks eat? A menu with less reliance on the staff of life is a good thing for me - at least for a bit. I decided that it was IMPOSSIBLE to live without caffeine as I've loads of work on at the moment and just cannot live with massive headaches, but I've compromised and switched to green and white teas. Still caffeinated, but with lots of antioxidants that my morning coffee doesn't provide. I've also come across a couple of other bloggers, like Meg at Harmonious Belly, who are dedicating posts to the cleanse. It's super-ace to hear what others think of the dishes and to see photos of their versions. Food-geekdom, to the max.

Sunday, January 2, 2011

welcoming 2011 with homemade English muffins & the food-lover's cleanse

On New Years Eve at midnight we sat in Amy and Martin's backyard and watched fireworks, with a 41 degree day behind us and a cool change winding its way between us. Champagne in hands, we agreed that 2010 had been an asshole of a year. So we decided to celebrate its passing with homemade English muffins, smoked salmon and scrambled eggs the next morning. The muffins were so delicious that I couldn't be bothered persisting with the camera, so I took the picture below later in the afternoon when it was time for a snack; I took it at that time on New Years Day when the feelings of newness and promise begin to settle in, and your mind turns to getting down to it, or back onto it. Or whatever.


I'd been hoping to make these about 11 times a day recently, but kept running out of time. What a shame! I should have pushed harder, because on New Years Day we learned that homemade English muffins knock the pants off store-bought muffins. And using the first cookie-cutter I stumbled upon in my post-sangria haze resulted in smaller muffins than what you see in the shops: not mini, but petite, and perfectly sized so that you can eat two, instead of just one.

They're really easy to make, my friends! Yardena and Nicole can attest to this, as they sat at my kitchen bench watching me while we drank sorely-needed coffee. The muffin dough needs little kneading, and is enriched with milk, a little butter and an egg. After its first rise (of around 50 minutes) it is knocked back down, dusted in polenta and cut into the sweetest little puffy muffin shapes that were so cute we wanted to beat them up. Another 10 minutes later, they're ready to go and you toast them in a dry frying pan until browned. They're then finished in the oven for another 10 minutes or so and come out piping hot and begging to be split and spread with slightly salted butter. You should really make these.

It was a lovely day of eating and going to the cinema and feeling sleepy after the chaos of the last few weeks, but thankfully the last of its kind for a little while; the catch-up drinks, many meals out, celebratory drinks, sweet Christmas treats, BBQs, days of feasting and boxes of average chocolates all add up and suddenly you feel a bit blah. Or in my case, TOTALLY blah. You know what I mean right? This year I've decided to attack this by doing Bon Appetit magazine's Food-Lover's Cleanse. I came across it a couple of weeks ago and it looked perfect for me in a number of ways:

1. It uses the principles of detoxing and cleansing in a way that is relaxed but consistent; the foods are nutritious, there's limited dairy and some fish and a tiny bit of meat, limited wheat and no coffee or alcohol. It has been developed by a food-writer and registered dietician, so the focus is on flavour and healthfulness - not low and empty calorie foods.

2. It is (really!) fully of delicious-looking food made with lots of ingredients I already have. This is a big issue for many people who want to embark on a program with a planned menu: buying all the spices you don't normally use, more fish or particular (more expensive) cuts of meat and eating something different for every meal, every day, things really begin to add up. The other thing that is unusual and great about the Food-Lover's Cleanse is that it uses leftovers! Roasted vegetables form last night's dinner get reinvented as a salad for lunch the next day. One bigger batch of citrus salad dressing is used multiple times over a week. I like this! Of course any sort of new program will have you spending a little, but when a significant portion of your time, effort and money is spent on food anyway (as with me), this doesn't seem like a big deal.

3. On a related note, the recipes are highly cutomizable once you understand the types of food and guidelines for the cleanse. This means that the program can be adjusted for seasonal and budgetary constraints. Being in Australia means that we're in summer now, while the plan has been developed for people who can get their hands on winter fruit and vegetables. I'm going to change up what I need to and blog about those substitutions and tweaks here, with little notes on what worked particularly well and what I wouldn't try again.

4. It means I get to make a whole range of recipes I've never tried before - including some from Yotam Ottolenghi's cookbook Plenty, that I've been wanting to get for ages (hopefully it will convince me to finally buy the book). Doing things like this usually means that I end up a couple of new recipes that can be thrown into the everyday rotation, which is always great.

I'll post on my progress and any deliciousness the plan puts me in contact with over the next two weeks. Join me if you like, or use me like a guinea pig and wait until I've tested the waters and come out on top (fingers crossed). So far, so good though. I'm writing this after eating a superb mushroom, onion and thyme omelet, drinking a cup of camomile tea. The sun is out and the caffeine withdrawal headaches haven't kicked in yet. I'm thinking about how lovely those muffins were yesterday, and about how great this year might be.

Homemade English muffins
From Gourmet Traveller 2010

1 tbsp dried yeast
pinch of caster sugar
60 ml lukewarm water
600 gm (or 4 cups) plain flour
1 1/4 cups milk, warmed
1 egg
40 gm butter, melted
1 tsp kosher salt
Polenta or corn meal, for dusting

1. Combine yeast, sugar and lukewarm water in a bowl and whisk with a fork until combined. Stand until foamy (5 - 10 minutes).

2. Add flour, milk, eggs, butter and salt. Mix well to combine. Turn this onto a floured surface and knead until the dough is smooth (between 3 and 5 minutes). Place dough in a greased bowl, cover with plastic wrap and stand until doubled in size (40 - 50 minutes).

3. Preheat oven to 180C. Dust your work surface with polenta. Knock back the risen dough and press out or roll to around 1 cm thick. Cut out muffins using a 9 cm cutter (or a little smaller, if you want to make petite muffins like me), re-rolling scraps to make more. I got around 20 out of my batch. Set these aside to prove for 10 minutes or so.

4. Heat a large frying pan over medium heat and toast muffins in batches until golden both sides (5 - 10 minutes). Transfer these to an oven tray and and bake, turning once, until cooked through and puffed (8 - 10 minutes).

Muffins are best eaten on day of making, but they can be toasted the following day, or frozen while fresh.


Monday, November 22, 2010

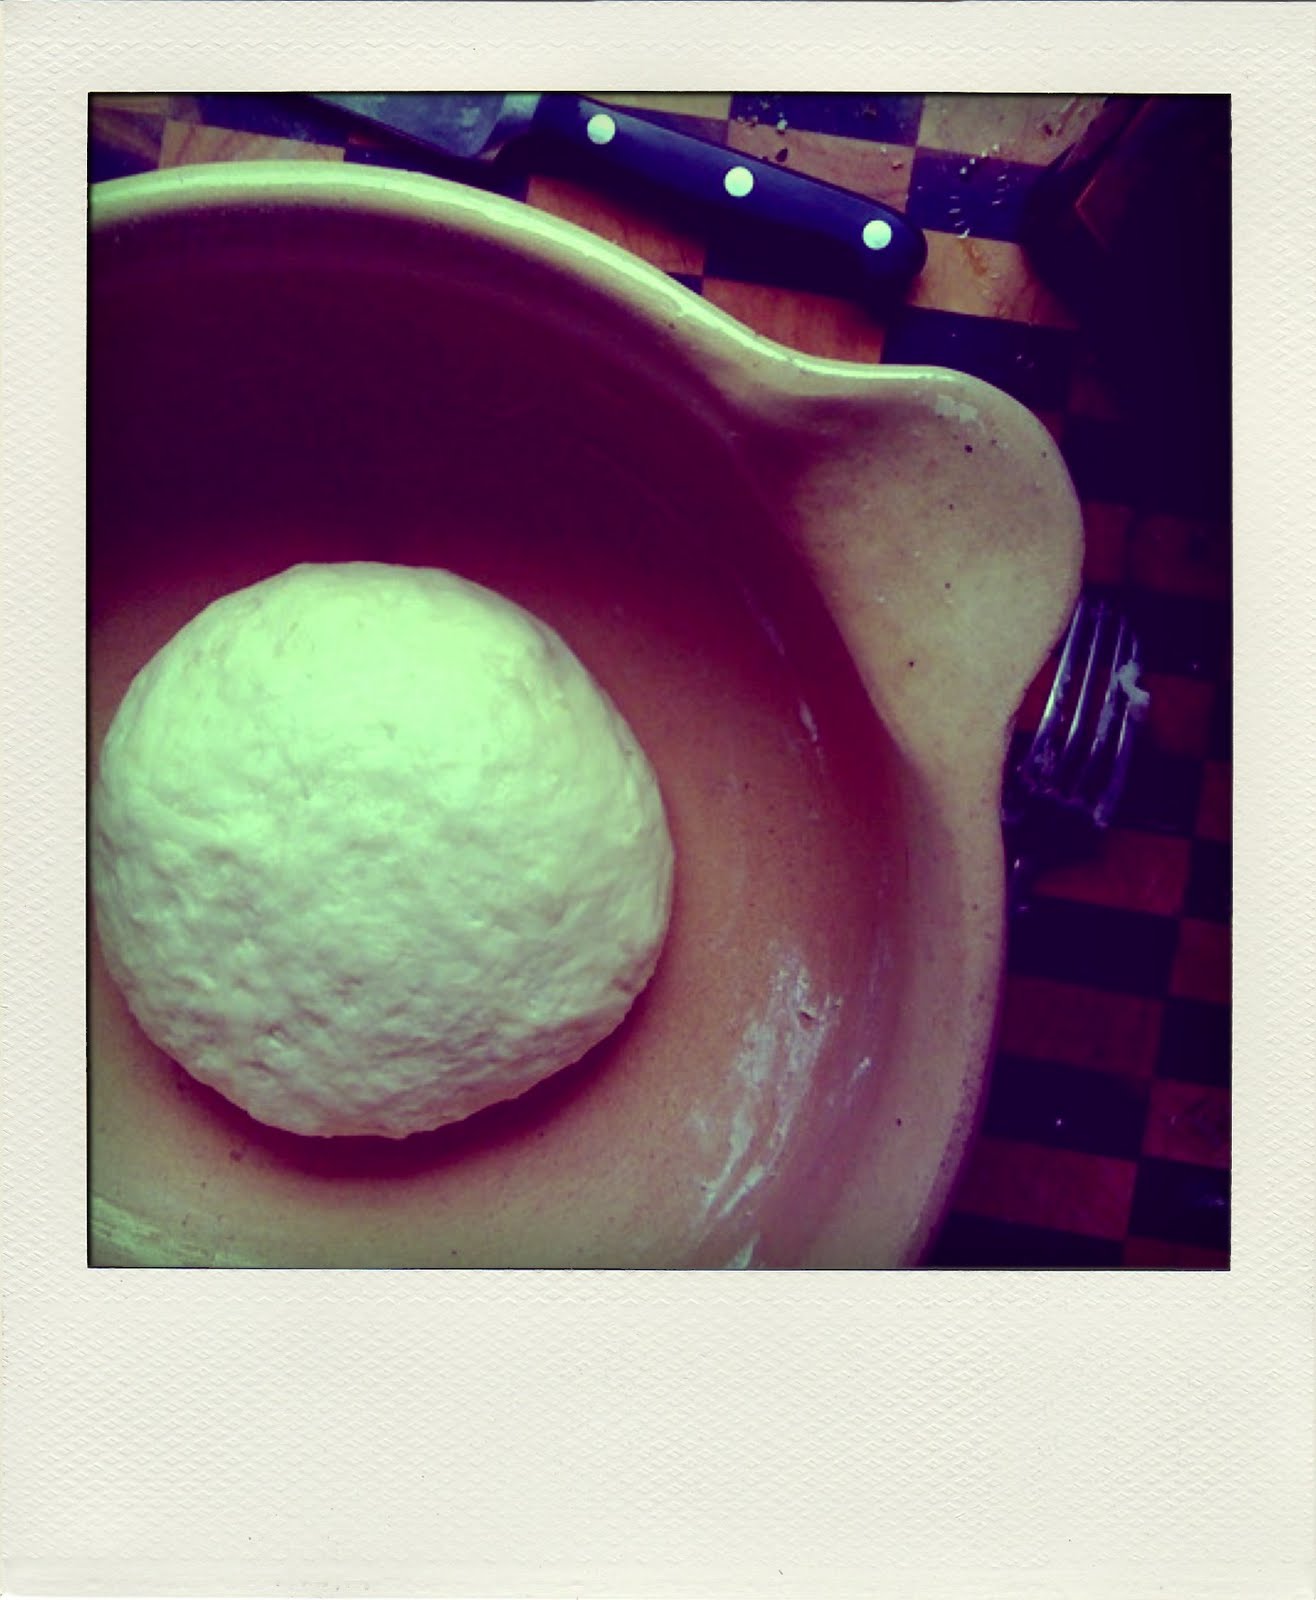
focaccia di patate

Have you guys seen this? I hadn't until yesterday, and now my life will never be the same.


I don't know what (besides procrastination) brought me to this recipe, because until now, I've never really been a fan of focaccia. I like the idea of it, but there are just so many bad ones around that taste like they've been around for a little too long... You know what I mean, right? Like their oiliness, which should be rich and pleasant, is always just, well, oily. I'm guessing poor quality oil is the problem with many of these commercially made focaccia. And what's with taking one of these, filling it with sun-dried tomatoes, avocado and cheese (a combination that really needs to be sent back in time to 1993, FOREVER) and squashing them into oblivion with a 3 tonne sandwich press? It's never as good as you want it to be, and stuffed with 'gourmet' ingredients it always costs more than you expect. RANT. But hey guess what? Focaccia is the absolute bomb, when you make it at home with a potato.


This is Luisa from The Wednesday Chef's recipe, first published at the beginning of 2008, and the bread is so good, that I'm jealous of all those people who've been making it since then. Is has a dense, chewy crumb and is moist and so delicious that you can eat it on its own; this is the marker of a wonderful bread. The magic element here is a mashed boiled potato (really!), which you add to the regular flour, water, yeast mix, enabling you to achieve a superb texture and perfect density. The dough comes together like a dream and needs minimal kneading, so it's great for new and/or hesitant bread makers. I've followed Luisa's example and topped mine with tomato and oregano, adding a brush of garlic oil to up the ante, but olives and rosemary or sliced potatoes and parmesan - or whatever you dream up - would be great too.


One more thing: you need to use good oil here - I don't mean top shelf at Enoteca Sileno, but something with enough flavour to make the bread really shine (visually and flavour-wise). Think about the fact that the flavour of the oil really comes through here. After all, if you wouldn't dip a bit of bread into a little bowl of balsamic and Criso blended vegetable oil, you probably shouldn't put that stuff into your bread, either.

Potato Focaccia
Makes one 8-inch focaccia
Adapted only slightly from The Wednesday Chef

1 medium floury potato
2 cups bread or plain flour, plus more as needed
1/2 tsp dried yeast or 1 tsp fresh yeast
A pinch of sugar
1 1/2 teaspoons salt
2/3 cup warm water
3 tablespoons extra-virgin olive oil
2 Roma tomatoes, sliced crossways
1 to 2 teaspoons dried oregano
Coarse or flaked sea salt

1. Put the potato in a small saucepan with enough water to cover. Place over high heat, covered, and bring to a boil. Add a handful of salt. Simmer until the potato is tender when pierced with a knife, around 20 - 25 minutes. Drain and let the potato/s it cool. When cool, peel and mash finely with a fork. Set aside.

2. Pour the yeast into a large mixing bowl and add the pinch of sugar. Slowly add the warm water in a thin stream, using a fork to help dissolve the yeast entirely. Let the mixture stand for a few minutes.

3. Add the flour to the yeast water and stir with your fork to incorporate, adding the mashed potato and the salt. The dough will be thick and shaggy as in the picture above - don't worry about this! When it is looking fairly even, add 2 tablespoons of the olive oil and knead the dough by hand, pressing against the side of the bowl, for around a minute, or until it is pretty smooth. It should come together pretty quickly. Add more flour if the dough is too sticky to handle. Form the dough into a ball and let it rest, covered with a kitchen towel, in the bowl for an hour.

4. Cut a piece of baking paper to fit the bottom of an 8-inch cake tin. Gently lift the soft dough from the bowl and place it in the cake in, patting it out so that it fits snugly. Cover the top of the focaccia with the tomato slices and sprinkle the oregano and a large pinch of coarse salt over, then drizzle with the remaining tablespoon of olive oil. Let the dough rest for another hour - it should puff up again nicely.

5. Halfway though the resting time, turn the oven on to preheat at 220 degrees. When resting is complete and oven ready, bake focaccia for 40 minutes, turning the pan halfway through. Let cool on a rack for 20 minutes before removing the focaccia from the pan - otherwise it may break.

Saturday, November 6, 2010

frijoles negros, or everyday black beans

I think if you're going to eat something everyday - or quite often, it should be made from the kind of recipe that serves you well every time. I have a bunch of these recipes scrawled out on the back of envelopes and receipts poking out of books and stuck to the fridge; there's my version of Molly's banana bread, the flour/yeast/water ratios for Jim Lahey's no-knead bread and a splotched crinkly print-out of the recipe for classic zucchini slice. One of the other things I make every couple of weeks is a big pot of frijoles negros, or basic black beans soaked and simmered with a dried chipotle chile until inky and creamy and totally delicious. At a Mexican-themed BBQ I had last weekend where I served them alongside charcoal-grilled achiote chicken, pico de gallo, mango salsa, salmon, apple and ginger ceviche, corn tortillas and mint caramel flan, the recipe for black beans was the one people asked for.


But this is a recipe that doesn't exist on any of those bits of paper, actually. It's just a preparation I made up, liked and stuck to - a "recipe" that before now, I've never thought much about. I fell in love with the creamy, rich texture of black beans in Mexico and they've been on high rotation in my repertoire since I got my hands on a source for the dried beans back here in Melbourne. I just soak a couple of cupfuls of beans, then rinse and throw them into my cast iron pot, covered with plenty of cold water. I throw in a peeled garlic clove or two, a peeled whole onion and a dried chipotle chile, bring to the boil and then let the whole lot simmer away until it becomes a thick and dark magic brew that smells wholesome and smoky.

The beans can then be used for a million different things. You can serve them on nachos, or alongside sausages. You can use them, with salsa and queso fresco, to fill vegetarian tacos or empanadas. You can moosh them up, add some stock and serve with crema for a satisfying black bean soup. You could puree them into refried beans and serve as a dip with tostadas, alongside eggs for a traditional Mexican breakfast, or use a thick layer as an additional filling for Sunday morning hangover quesadillas. Or even better - and Aussies might have to trust me on this - you can serve them hot, spooned over the top of a plate of freshly cooked rice, garnished with coriander, chipotle crema, chunks of avocado, hot sauce and lime. It's my most favourite cheap, warming, filling comfort meal, but not something you hear much about down here in OZ.


While there's not exactly a recipe here for these babies, there are some things you should you know about cooking black beans that might help if you've never prepared them before:

1. Dried beans are better than canned. TRUE. I don't care what Jamie Oliver says - I can't afford imported canned black beans (at $5 a pop) and they're nowhere near as good as those you soak and simmer yourself. It may take some forethought, but it certainly doesn't take much time to soak beans while you sleep and to throw them in a pot to simmer for a few hours on a Saturday morning. Save dollars, food miles and packaging - and get compliments from everyone.

2.Good-quality, freshest dried beans are MUY IMPORTANTE, amigo. Black beans are a little hard to come by in Melbourne anyway, but those sold at Casa Iberica in Fitzroy are really worth the trip. Woolworths now sells black turtle beans under their 'Macro' label in the health food aisle; these are ok, but you just won't achieve the creaminess and flavour you're really after.

3. Don't throw salt into that water! At least not for the first hour or so. Word on the street is that this makes them tough as little stones (though I've heard contradictory theories too). I've always seasoned later and never had a problem with tough beans, so I'm sticking to this rule. Salt some after an hour or so of cooking and adjust as necessary when they're done.

4. Flavour as you like. I throw in a dried chipotle chile (also available at Casa Iberica or online here) to infuse the whole pot with a smoky, subtle heat that doesn't interfere too much with the different dishes I add my beans to. But throw in whatever you like; fresh bay leaves, ground coriander or a chunk of smoky bacon.

5. Skim that scum. Shortly after your beans come to the boil, a frothy scum often rises to the surface. You want to skim this off with a big spoon so that the texture and flavour of your beans and their liquid really sing. Once you turn down to simmer, check for more scum every so often and remove as necessary.

6. Add more water as needed and don't let the beans dry out. By the time the beans are tender and creamy, the water will have transformed into a thick black-purple sauce - you want to make sure there's enough of this. If you intend to puree or mash the beans, you may want a even little more liquid.

7. Taste! Cooking time depends on how long you soak and how fresh your beans are. These ones took just under two hours after an overnight soak, but there's only one way to find out if yours are done...

Friday, September 10, 2010

sides as mains II: golden fried artichokes

I wish I wasn't so lazy. If I wasn't, I'd cook artichokes more often. I'd especially cook them like this. Artichokes dusted with a little flour, fried until golden and served sprinkled with salt and a squeeze of lemon - these are found often on the Greek dinner table when in season. I had a craving for them this week so bought three big artichokes from the market and proceeded to procrastinate cleaning and cooking them for the whole week. But the food-wasting guilt built up, so I sat down earlier this evening with knife in hand, over a lurid blue bowl of acidulated water and carved those babies up. Like most things you I procrastinate doing, it took less than half the time I thought it would. And it was so worth it.


If you've never cleaned artichokes before, they can be a bit intimidating. After all, they're spiky, armored things and one of the oldest continually cultivated vegetables known to man. So before you decide to do this, you should know that when parboiled, dusted and fried, artichokes become something close to the ultimate vegetable; the outside leaves separate a little and transform into the crispiest chip-like petals that encase the vegetable's tender centre that is sweet, clean and slightly nutty. I hope you're convinced.


Not yet? Maybe if you think about how the sprinkle of sea salt on these hot, crispy chippies amplifies the deliciousness by another 100%, and then how the squeeze of lemon adds zing and freshness, balancing out the richness of the fried crispy coating. Did I mention that I've upped the nuttiness here and given these a super-fine extra-crispy coating by replacing the regular flour with besan, otherwise known as chickpea flour? So this is totally worth it.

There's great instructions with pictures here for preparing artichokes. Before beginning, fill a bowl with water and squeeze in the juice of half a lemon. You can throw the lemon in as well. Save the other half - you'll need it to rub the cut sections of the artichokes to stop them from going brown. Make sure you're using a sharp knife, otherwise this can be a dangerous operation! You might be shocked at how much of the vegetable you end up throwing away, but rest assured that the rest is inedible and the middle is worth it! What you're left with you can bake, braise or boil. After this you can grill them or make them into an ace gratin. They're really good with eggs, cheese, thyme, peas, bacon, homemade mayonnaise or aioli. Or you could dust them with besan and fry until crispy and golden, as below.

Golden fried artichokes

3 artichokes, cleaned and halved
1 lemon, halved
1/2 cup of besan (chickpea) or plain all-purpose flour
light olive oil, to shallow fry
sea salt

1. Squeeze one lemon half into a saucepan of water and bring to a rapid boil. Drop in artichoke halves and cook for around 5 minutes, or until the vegetables are tender but soft (poke with the end of a knife to test this). Drain into a colander and let cool. This step can be done ahead of time, if necessary.
2. Heat olive oil in a deep frying pan until hot (not smoking). Meanwhile, toss artichokes halves in flour on a plate. Tap to remove excess.
3. Fry artichokes until golden on both sides. Transfer when done to a paper-lines plate to drain.
4. Sprinkle with sea salt to taste and serve with lemon wedges.

Friday, July 23, 2010

rocket and pistachio pesto

Just becase you love food, doesn't mean you always find time to cook. I'm sitting here thinking about how one of my typical days in recent weeks might be represented in a pie chart, but I'll spare you that. That would just be another way to procrastinate - and it has already made me want to bake pie. At the moment, most of my day is spent reading and writing, a little bit is spent sewing and a very, very small amount is spent cooking and eating. Being in the middle (or closer towards the end, but it still feels like the freaking middle) of a PhD sometimes makes me forget about food; this is when I can't be bothered cooking for myself and I find myself considering the possibility of eating while I sleep via intravenous. But other times, I want to cook a whole Blumenthal buffet with multiple courses and towering translucent wobbly jellies from children's storybooks and Silky's pop biscuits. But there's no time for all that. There is time for pesto, however.


It's the middle of Winter here in OZ and buying a big bunch of basil would be wrong on two counts (flavor, price). And with pistachios sitting in the cupboard after that glorious muesli the other week, the way forward was clear - Tessa Kiros' rocket and pistachio pesto. All you need is a handful of pistachios, some garlic and parmesan, a handful of rocket (arugula) and a nice fruity olive oil. You whiz it up the first bits in your blender or food processor - or if you're smarter than me and have finished your thesis you can do it in a pestle and mortar - and add the oil to make a very bright green and sharp/sweet pesto.

I've made this pesto lots of times now and it is so good - I sometimes even make it in the summer when basil is plentiful, just to mix things up a bit. It is great through pasta, of course. But it's also (especially!) awesome drizzled over golden roasted hasselback potatoes half way through cooking; the potatoes come out with this insane gold-green crust of nutty, cheesy flavour, making them a perfect side with something like roast chicken or a substantial and impressive contribution to a vegetarian spread (Tessa even recommends leaving out the cheese for coating potatoes, making this vegan-friendly). I've mixed this pesto into salad dressings, drizzled it on pizza and dolloped in into soups before serving. I've eaten it with fresh ricotta on toast.

If you're short on time, make this. It's very good stuff.

rocket and pistachio pesto
From Tessa Kiros' Falling Cloudberries

2 garlic cloves
60g (or 1/3 cup) shelled pistachios
60g rocket (or arugula)
40g parmesan cheese, grated
250ml (1 cup) olive oil

1. Crush the garlic to a lumpy paste with a little salt.

2. Pulse the pistachios in your blender to coarse bits. Add the rocket (I chop mine up a bit first) and continue to pulse until you have a relatively consistent, but coarse paste. Scrape this out into a bowl and stir in the garlic, parmesan and olive oil. Mix through well and taste for seasoning. Depending on the pepperiness of your rocket and saltiness of your cheese, you may want to add some salt (mine often needs a little to make it sing). You're done! If you don't use this right away, it keeps in the fridge for about a week, as long as the top is covered with a layer of oil.

Wednesday, September 2, 2009

Neither here nor there - with an egg on top

In Pierre Koralnik's 1967 telemusical Anna, there's this great scene where Anna Karina - in the throes of an intense crush - is just fluffing about at home. Those who've seen this great film will know that she's about to break into one the highlight songs of the movie, 'Rollergirl'. But before she does, she dilly-dallies around her apartment for a bit in thigh-high striped socks. For the briefest moment, she decides to cook an egg: she cracks into into the little pan, stirs it with a chopstick or something, but then just gives up and walks away. She doesn't know what she wants - and that's exactly how I feel at the moment.


Which, actually, has led me to eating a lot of eggs. Or things with eggs on top. So while I don't have a recipe (still) for you, I have a list of things which are made even more excellent with an egg on top. Like plain risotto - especially if you fry some sage leaves until they're crispy and scatter them over.


Or put one on top of some ratatouille, or sauteed cavelo nero with a bit of garlic. Or in the middle of some sauteed green peas and bits of chorizo to make Tessa Kiros's Portuguese eggs - or set a perfectly poached one on top of a handful of still slightly crisp asparagus and shave some parmesan over the top. Or just put one on a plate, splash it with hot sauce and eat it with bread. If you didn't eat the egg - if you just smoked a cigarette instead - you'd probably end up looking a bit more like Anna Karina. But for all those times when you're sitting around in your stripy socks on a sunny morning, feeling neither here nor there - an egg is almost perfect.

Saturday, June 13, 2009

Beetroot & Goat Cheese Risotto

It's been so long since I posted that I wish I had something more spectacular to offer than this risotto. Because it was nice - and actually very much what I felt like eating at the time - but not mind-blowing. Especially seeing as I was watching Masterchef while stirring and they were teaching the contestants how to smoke beetroot. Suddenly this felt a bit average.


But it did look very pretty. And it was very comforting thing to eat on a cold evening, away from home. And you can even make it in a severely handicapped beach-house kitchen. You can find the recipe for it here. I won't copy it out for you, because I hardly changed a thing. Except I'd recommend replacing the tinned beetroot with fresh cooked, of course (peel and cut into bite sized pieces and cook until tender in a little water and a splash of balsamic vinegar). And I was without walnuts, but I think they would have been good.

Because there's such a small amount of red wine in this, I'd recommend buying a better bottle and enjoying (some of) the rest with dinner. It ain't smoked beetroot with feta blini, but then again, this ain't Masterchef.

If you're looking for other ideas for that leftover goat cheese, try this cool food and cooking resource Foodista. Super-useful!

Soft Goat Cheese on Foodista

Sunday, February 22, 2009

Kolokithopita (Greek Cheese & Pumpkin Pie) & How to make (the best) Greek cheese pies

When we arrive in Greece, we always take a bus from the airport to the bus station that services the Peloponnese. The bus joins the chaos steaming along newly built highways and speeds past half-completed concrete buildings, through the industrial outskirts of Athens. From the other side of the bus window the chaotic momentum of this magnificent, sprawling, modern city begins already to weave its magic spell on your jet-lagged eyes, making them big and wet again. And then you pull into the big old bus station made of painted tin and it's a different world altogether. Gypsies and business men wait by suitcases and bundles of fabric, while priests read newspapers and old men sell lottery tickets. Old, old Greek music spills through crackling speakers at a volume they can't handle. And people sit down for something to eat before long journeys. I love this wait for all these reasons - and because I always buy a tiropita from the cafeteria.


It's one of the things I do to make sure I'm really there - because in Greece tiropita, or cheese pies, are everywhere. They're sold at stations, through shop windows on the street and in bakeries all over the country, and there are so many varieties that I've accepted I'll never be able to try them all. Outside of Greece, the most well-known seems to be spanakopita, the cheese and spinach pie - but I sometimes worry that it's become one of those dishes people make only when they have a vegetarian coming over. A good Greek cheese pie - let's start calling them pita - should be something everybody loves, something perfect to take to parties, barbecues and to have for dinner with a salad.

This is also a recipe request from my darling friend Yardena who wants the recipe for spanakopita. Instead, I made a kolokithopita (cheese and pumpkin), but have included instructions for turning this into a number of Greek cheese pie delights. And I've also included photos and instructions on how to make Greek cheese pies village-styles, because whenever I make them like this, people swoon. For some reason, many people are scared of using filo pastry. Which is a damn shame because it always seems to me to be the easiest to handle of any kind. In fact, the whole dish is superbly simple and can be thrown together in very little time.


In Greece when you buy tiropita or spanakopita they're often hand-sized and made with flaky pastry, which contrasts wonderfully with the salty, creamy filling. At home, they're usually made with filo like mine below - for this style filo is best. I've used a non-commercial filo that I buy from a Turkish grocery store - you'll see that it's a little thicker and easier to deal with. It also goes wonderfully crispy when brushed with butter and baked. Try Middle Eastern food stores and continental delicatessens, but if you can't find it, just use the commercial variety and adhere two sheets together by brushing with butter to make a thicker piece.

The pumpkin pita has everything that is excellent about the cheese pita, with the sweetness of the pumpkin to contrast with the salty creamy filling. You simply grate the pumpkin into the cheese mixture raw and it cooks inside the pie, lending moisture and lightness without ever becoming soggy. The ricotta, with the help of an egg, sets the filling just firm, and the best thing about making it into a round whirligig is that this spiral of sweet and salty cheese and pumpkin is encased in layer upon layer of thin, crispy casing. To take it to the next level, add a grating of nutmeg and a swirl of good honey to the filling. Trust me, everyone will ask you for the recipe.

Kolokithopita (Greek cheese and Pumpkin Pie)
Note: the amount of pastry (and filling) will depend on the size of your tin or tray. To make spanakopita (spinach and cheese pie), substitute the pumpkin for a bunch of spinach, wilted, strained and finely chopped. Instead of honey nutmeg, use some dill or fennel fronds. For tiropita (plain cheese pie), increase the ricotta and feta by 100g of each. I leave the nutmeg and honey in, but do as you please!

100g butter melted
3 large round sheets of handmade filo pastry, halved or around 12 sheets of commercial filo pastry

For filling:
500g fresh ricotta
400g feta (goat or sheep milk is best)
1 egg
350g pumpkin, grated
a grating of nutmeg
1 tbsp honey
salt & pepper

Preheat oven to 180ºC/350ºF.

Crumble ricotta and feta into a mixing bowl. Add egg, nutmeg and honey, then mash and mix up with a fork until combined. Add grated pumpkin and season with salt and pepper, remembering that the feta is salty. Mix with fork.

Brush tin or tray with melted butter to grease.

Spread pastry out and brush all over with melted butter. If using commercial filo, join two sheets with butter and use as one. Spoon filling along one long edge of pastry almost to the edges. Fold in edges, then roll the pastry away from you to form a tube. Fit into tin, bending gently to curve. Repeat until the spiral is complete. You should have some butter remaining - use this to brush over the top of the pie generously.

Pop into oven for 40 - 50 minutes or until golden brown. In a rental property oven (like mine), you may need to turn the pie halfway through cooking and/or leave it in a little longer. Cut into wedges and serve straight from the pan.

Friday, November 21, 2008

Minestra di Zucca (Pumpkin & Bean Soup)

I missed the warm weather that teased us last week. It tricked us into barbecuing and drinking beer as if it were summer already. But this evening it hasn't stopped raining and my little cat and I felt stuck inside on the couch, watching bad movies on TV, half reading a new book. The thing that set this evening right was soup - and once I'd thought of it, I was glad for the rain. 


This is an Italian vegetable soup I've made many times since coming across it in delicious. a few years ago and it's the easiest to put together. A sofritto of pumpkin, leek and celery makes a sweet and flavorsome base to which you add good vegetable stock, then let the pot simmer away. When the vegetables are tender, you simply throw in a can of lentils and a can of cannellini beans and puree or blend to the consistency you like best; I like mine thick and chunky. The beans and lentils give the soup a hearty dimension, and a bowl of this with a thick slice of buttered sourdough is the most comforting and satisfying meal. Serve with a good grinding of pepper, and if you're feeling austere, a swirl of fresh cream. After this, the rain doesn't seem so bad after all. 

Minestra di Zucca (Pumpkin & Bean Soup)
adapted from delicious. May 2005

600g pumpkin, peeled & cut into pieces
2 large leeks, (white ends only) chopped
3 large celery stalks, chopped
1/2 cup olive oil
1 good-quality vegetable stock cube
400g canned lentils, drained
200g canned cannellini beans, drained
thickened cream, to serve

Add olive oil, pumpkin, leeks and celery to a large saucepan over medium-low heat. Fry gently, stirring until vegetable soften and begin to look sticky. 

Add the vegetable stock with 1.25 litres of water and bring to the boil. Return heat to low and simmer gently for around an hour. 

Add the lentils and beans and season with salt and pepper. Using a stick mixer (or transfer to a blender) puree to desired consistency. If it seems too thick, add a little more water and taste again for salt. Serve with a swirl of cream and fresh pepper. 

Sunday, November 16, 2008

Yemista (Greek Stuffed Vegetables)

Warm, soft and rich, yemista is comfort food at its finest - the kind where the first forkful always summons memories of eating it in the past. Memories of my grandmother's version, eaten in the hot summer evening, with salty hair and sandy feet, at the plastic table on her rooftop balcony. Or my mother's version, cooked on Sunday, eaten on Monday after long days at work, or at school. It's beautiful how the most humble dishes can invoke such vivid recollections of moments past.


Like many of the finest Greek dishes, yemista is rich but wholesome. The vegetables become fleshy and sweet after their long roasting, and the filling of rice, vegetables and herbs transforms into a kind of soft, dense risotto. The recipe given below is vegetarian, but you can make the more traditional version with meat by substituting some of the rice for mince and frying it off before you add the other ingredients. Both versions are delicious.

Hollowing out the vegetables can be a bit of a job - depending on what you use - but it's not a bit difficult, and the result is always worth it. You can add pine nuts to the filling (or whatever else you think would be good) or throw quartered potatoes into the roasting dish around the vegetables to make a more substantial meal. This dish makes an excellent hot dinner on chilly nights, but is perhaps even better eaten (all year round) slightly warm or at room temperature for maximum flavour. Prepare it a day in advance and, magically, the flavour only improves. 

Greek Stuffed Vegetables (Yemista)
A note on choosing your vegetables: go for those that are rounded with plenty of room for stuffing. A bottle-neck shaped eggplant will cause much grief when you attempt to hollow it out - look for those that are wider at the top.

4 red capsicum
2 large eggplants
5 large tomatoes
1 large brown onion, finely chopped
2 cloves garlic, minced or finely chopped
5 tbps (or so) of good olive oil
A good knob of butter
1 1/2 cups of aborio rice
1 medium zucchini, chopped into a small dice
1 tsp cumin
3 or 4 tinned tomatoes chopped, with their juice
a big handful of chopped fresh parsley 
1/3 cup of dried currants
around 800ml vegetable or chicken stock
salt and fresh ground pepper
3 tbsp olive oil, extra
Juice of 1 lemon
1/2 cup grated mizithra (salted dried ricotta) or parmesan

Using a sharp little knife (carefully!), cut the tops of the capsicums to make what looks like little lids or hats and scoop out any seeds. Cut the seeded heart from the lid so that that each capsicum is entirely empty. Keep the right lids with the right bottoms! Cut lids from the tomatoes and gently scoop out the flesh and seeds, chop up any larger bits and reserve in a bowl. Cut tops from eggplant and scoop out flesh and reserve in a colander. Sprinkle with salt to draw out any bitterness. 

For filling, pop oil and butter into a large frying pan. Cook onion, stirring, over low heat until translucent then add garlic. Stir for a minute or so, then add rice and stir to coat well. Stir in the cumin and the currants, add some freshly ground pepper. Rinse eggplant flesh of excess salt, chop finely and add to rice along with zucchini. Fry this mixture, stirring every now and then, until vegetables soften and begin to look sticky. Pour in the reserved tomato flesh and juice, add the tinned tomatoes and throw in the parsley. Stir in around 500ml of the stock and cook for 10 - 15 minutes. Stir from time to time and add a ladle of stock if it looks like it's drying out. The rice should be about half-cooked. Taste for salt (this will depend on your stock). Take off the heat and let cool slightly. Preheat oven to 180˚C. 

Fill each hollowed-out vegetable nearly to the top with rice mixture, add its little hat and arrange in a large roasting dish. Add lemon juice to remaining stock and pour around vegetables to keep moist during cooking. Pour extra olive oil over vegetables. Sprinkle with cheese. Cover with foil and pop in hot oven for 1¼ - 1½ hours, removing foil after first 45 minutes to get a nice colour on the vegetables. If they seem dry, add a little water. They're done when they're soft all over and golden on top. 
Related Posts with Thumbnails